Thursday, January 1, 2015

Pom-Pom Garland

I know it's late, but I wanted to share the cute pom-pom garland I made for my Christmas tree.
This cute garland is made with crafty stuff I had in my stash. The pompoms I found at the dollar store last year, Score! I found some packages of solid pink pompoms at Hobby Lobby, in case I decide I need yards and yards of this garland for the tree. (which I'm pretty sure it does.)


I used embroidery thread, full thickness (I didn't have any yarn) and alternated clear beads with the pom poms. I left it pretty loose, with some space between everything.


Here's a couple bad shots of my white Christmas tree. I think the pink pompom garland is the perfect touch.  In this picture, you can see one of the feather ball ornaments I made last year. It'a basically pink feathers glued to a styrofoam ball. I found both at the craft store.


And in this picture is a shot of the broken mirror felt ornament I made 2 years ago. I was really sad about a cheap mirror that broke, and decided to cut it into small baby pieces (which is super easy, by the way) and then hot glued them to felt, (it's 2 pieces of felt, to make it stiffer/stronger) and then I put a row of glitter around the edges. I'm sure you can put glitter on each edge, act like it tile grout, so that there's not chance of cutting yourself, if your worried.  Oh, and that's a baby pink feather boa I used as garland as well. And pink disco balls. I'll try to find the good pictures of the tree, it's pretty cute, if I do say so myself. :)


Ok guys, hope you have a wonder New Years!
Hugs!
Caroline

Wednesday, December 31, 2014

DIY Haunted House from a Dollhouse!

Here's a draft post from October 18th, 2014 i just found!!! I'm just trying to clean things up, and get things out to the blog.

From October 2014:
" Once again, i was inspired by Pinterest. I found the cutest thing., making a haunted house out of  a old plastic doll house.
Here's my inspiration.
Fabulous Haunted House 

****Updated Note (5/8/2017).. The link doesn't work anymore. The original website is gone.***


As you can tell, I'm not quite done with it, the post, and my doll house haunted house. ... I'll finish it up next Halloween, but I wanted to at least post this.  I painted the house black, and took off the trim and painted parts purple and other parts green. I didn't get a chance to seal it a clear, so the paint kinda scrapes off if you scratch it or knock into it.
Here's what it looked like before..


I dont' have a picture of it in black. I think my sister does.  I'll have to save it for the updated post.

This is what I did on the wall about the couch. I have a bunch of Halloween signs, printouts, and pictures that I grouped together. I just realized this is the half way picture. We then found a package of vinyl crows and creepy tree branches to a put them all over the walls. Spooky!


This is a shot of the dining room. Yeah, I get it all tricked out for Halloween. It was like this for a month!
I found sheer black curtain panels at the local thrift store, and then a purple zebra striped curtain,that I cut into thirds,and sewed together on the short ends and made one big long strip of fabric to drap along the top.  This is all held up with push pins. Loooks fabulous,but totally easy to just pull off the wall. (I strung the black sheer curtains on some twine and contected the twine to pushpins. That was the most difficult part).


Here's a shot of the table decorations.


I'll do a separate post about this skull in the picture frame later, but just wanted to put it here cause I love it so.
It's a picture frame from IKEA, that the glass broke out of, and I wasn't about to throw it away. I found a glitter styrofoam skull and using a knife, cut off the back part of the skull and hot glued it on to the paper backing that I painted a random red color. It's kinda wavy and not thick, so I'll be fixing that next Halloween.


Anyway.. There's lots of Halloween stuff to look forward to next year!. Lots of projects to finish and make better!.

Have a great night!


Hugs!  
Caroline. 

Tuesday, October 7, 2014

Creepy Zombie Barbie Halloween make-under


Happy Halloween everyone!
I'm excited to show you Aimee's Barbie head transformation to our newest creepy zombie! She lends just the right amount of creep to all of our cute and fun Halloween decorations.  We got the idea to make her from  fartsandcraftsroom.wordpress.com
Thank you for the awesome Halloween inspiration and wonderful ideas!  
Read on, and enjoy the photo montage of Barbie's make-under.   


Monday, September 29, 2014

Halloween Skull Pillows

Yay! It's Halloween time! And that means I can start decorating! Actually, I pulled out all the decorations a couple weekends ago. If I'm going to put it all up, I want to enjoy for at least a month. Right?!  Check out these cute Skull and Halloween couch pillows I made last year. I'm so excited to bring them out again.


Sunday, August 10, 2014

Bowling Shoes Makeover!!

I had plans to go bowling this weekend, so of course I had to have matching shoes to go with my fancy gold bowling bag! For those who missed it, you can see all the details here about my bowling bag redo. It's all about color coordination. I might not be able to bowl, but at least I'll look good throwing those gutter balls!


 I've had these bowling shoes for years. I found them at the thrift store for $3.99.  I do like the old school charm of the red and blue bowling shoes. I've actually worn them out with a 50's themed outfit. And with jeans, just for fun. But I think its time to change things up a bit. Plus the red and blue didn't match my $1.99 bowling ball, also a local thrift store find. (Isn't it silly how we can remember exactly how much we paid for something ?)
So out came my trusty gold spray paint!

the original color of the bowling shoes

All these pictures were taken after I wore them. I must have scraped the left shoe against something to rub the paint off on that one spot. You can see a hint of the red peeking through. 
I bought purple glitter shoe laces on the way to the bowling alley. They aren't as long as the original laces. I had to skip a couple eyelets while I was lacing these up, so I could tie a decent knot at the top. I must have bought the shortest length of laces ever! I just saw glitter and said SOLD! I'll have to hunt around later when I'm not in a hurry. I'm sure I'll find the exact color of pink to match the glitter stripe on the bag. 


 Here's another shot of my bowling shoes.


Notice how the pink glitter is coming off the bowling bag. I applied the glitter with Mod Podge. It's really
thick. I did at least 2 layers. The bag is bent in a weird way on the edge, which doesn't help. If I try to bend it straight, it cracks the glitter. Also, I didn't think to rough up or sand the stripe area first, to help the glitter glue adhere better. Next time. Or when I patch up the missing part I'll take some sandpaper to the spot.


 I wanted the size detail of the shoe to stand out. I didn't want to spray over this. Since it was already midnight, and way past my bedtime, when I started this project,  I grabbed the first thing I could think of; Vaseline hand lotion. (I had just put it on my elbows, okay?) and I wasn't about to fight putting tape in a circle. I applied the Vaseline with a Q tip, to just the inside of the circle. I also rubbed the Vaseline all around the shoe edge, where it's white. I wanted it to stay white. I must not have slathered it on enough, since the edge didn't stay white. It's pretty much gold now. Oh well.
I did a quick spray over everything, then went to sleep
The next morning, I took a couple minutes to check them out, see if I missed any spots (nope. good to go!) and then wiped the circle areas free of the paint. The gold spray paint covered the Vaseline inside the circle. I was a bit worried, but it wiped off without any problems! I only had to scrub a little bit. There's still a pin head dot of gold here and there, but that'll come off in no time at all.
I tried to rub off the gold paint around the bottom shoe edge, but the lotion must have soaked in. I'll try again later and concentrate on making that white, and actually scrub instead of a half-hearted wipe down.


They look pretty cool close up, huh? :) I'm really happy with them. I was kinda afraid gold would be too much. What if they looked like clown shoes, or something from a bad 80's music video?? Yuck!
If I ever get tired of the gold, I can just spray paint them a different color, or two. :)

And bowling, you ask? I wasn't really paying attention to the bowling. I was too busy flirting with all the good looking men! (Jeff, Roger, Scott, and possibly Bob) But when I did bowl, I personally made 2 strikes, a bunch of gutter balls, a lot of random partials, but the best was my niece Aimee who bowled for me and knocked down almost all the pins by throwing the ball granny style, backwards! Then she got another strike bowling with the wrong hand! That girl got skills! lol! 

Happy bowling everyone! And if you can't bowl, at least you'll look great trying! 
Hugs!
Caroline

Wednesday, August 6, 2014

What I made this weekend while it rained

Hi folks!
This past weekend it rained here in the desert. It was beautiful! More than five minutes worth of rain too! I love the rain! I don't know about you, but rainy weather always makes me want to stay at home, make cookies and snuggle on the couch with a blanket and read. Doesn't that just sound dreamy?!

Well, since I wasn't about to go anywhere..(and in case you were wondering.. Yes, I was strong, I did NOT make cookies) I decided to tackle a project I've been putting off for a while. I started cleaning/reorganizing my crafty area. Yay! Go me! (don't you just love when you finally get around to doing something, and it's not as hard or takes as long as you thought it would be? I love that feeling!)

I'm not quite done with it yet, but it's looking great! I spray painted some stuff lying around to help organize too.
Stay tuned for that update!

In the meantime... While sorting all my precious precious piles of craft supplies, I found 4 packages of pre-cut quilt squares. What did I immediately do? Why, set up the sewing machine, of course!

I "needed" a break from all my hard work, so I finished the day by making a quilt top from all those little squares! I conveniently found matching pink and while polka dot fabric, plain white fabric and the aqua patterned fabric, and I only had to look in 2 boxes stashed in the closet! (one day that'll all be sorted out/given away. Minimizing my stuff. I'm working on it slowly.)

So, here's the finished diversionary project. Hope you like it!  My new quilt top. I have more to go to finish it up, but the hard part's done


It'll look even better once I iron it. I'm going to use a extra sheet that was destined to the thrift shops as the backing. I love that I can use stuff around the house!


 I put a stripe of pink around the white. It helps finish it off. It looked funny just with the white edge. It needed something else. I debated a stripe of aqua blue, but that would be too much, I think.

I haven't even trimmed the random threads..

Total cost:
4 quilt square packages found in my personal stash= free
White fabric = free
pink polka dot fabric = free
aqua print fabric = free
white sheet for quilt backing = free

The only thing I need to purchase is the batting. Nice! And hopefully with a 40% off coupon, too.

What fun things have you made instead of doing something else? :)
I read a study finding these diversionary things are good, They help you concentrate harder, later on the original thought. I can't find the exact article, but I found another one here that's equally as good, or better!
Happy crafting!
Hugs!
Caroline

Sunday, August 3, 2014

DIY necklace holder

 Hi Friends!
I've been wanting to show you my awesome necklace organizer/holder!  It's totally easy to make, and cheap too!


Why did I make my own? Well, I have tons of necklaces squirreled away in different spots. If I don't see them, I won't wear them. You know that old saying, "Out of sight, out of mind."? Yep. Totally true in this situation. I needed to find a way to hang them all together where I can see them. This way, I'll actually wear them, and now I know what I don't have, so the next time I'm out shopping I can pick up something to go with that new darling outfit.

Like we really need a reason to make a necklace holder, right? ;)  But in case you do, let's just say this will save you time and money in the long run so you won't wind up with 3 necklaces to match the outfit you wear once a year and nothing to match the outfits you wear all the time (office wear, those Date Night little numbers you look smoking hot in, etc.)  Plus you'll always look fabulously accessorized!

Like you, I've seen lots of cute and different ways to hang up and display necklaces. I've tried out quite of few of these ideas too. I just wasn't excited about necklaces in picture frames. I have more than 4 necklaces, and not enough wall space to display all those frames (or the effort to hunt down nice big picture frames for cheap). I've tried using hangers, and even put necklaces on those over the door storage hooks. The knobs on a shelf are cute, but once again, I'd have to use more than one set.

I must have mentioned it a few times, cause my sister Natalie came up with the fabulous idea to using a regular ol' trellis from the hardware store. At first, I was like, "Nah.. It's not going to be cute at all."  I just couldn't picture it. I was thinking a trellis is some rough, splintery wood that'll take way too much work to sand down. But one day, she walked in with this cute white plastic trellis, and said here, go for it!


This trellis came in the standard 12 feet. I cut a couple inches off the top with a my trusty folding hack saw. I probably should have measured, but I just eyeballed it, and cut some off, then propped it against the wall, It wasn't quite right so I cut a little bit more off. The second time around it fit, so I was done. The plastic was really easy to cut. I could have used a really sharp stake knife and sawed through it too. I have mine from floor to ceiling. I used a couple small nails here and there to attach it to the wall.


The best thing about it? it fits behind the closet door! Totally low profile and right next to all my clothes.  I can stand there and pick something out. 


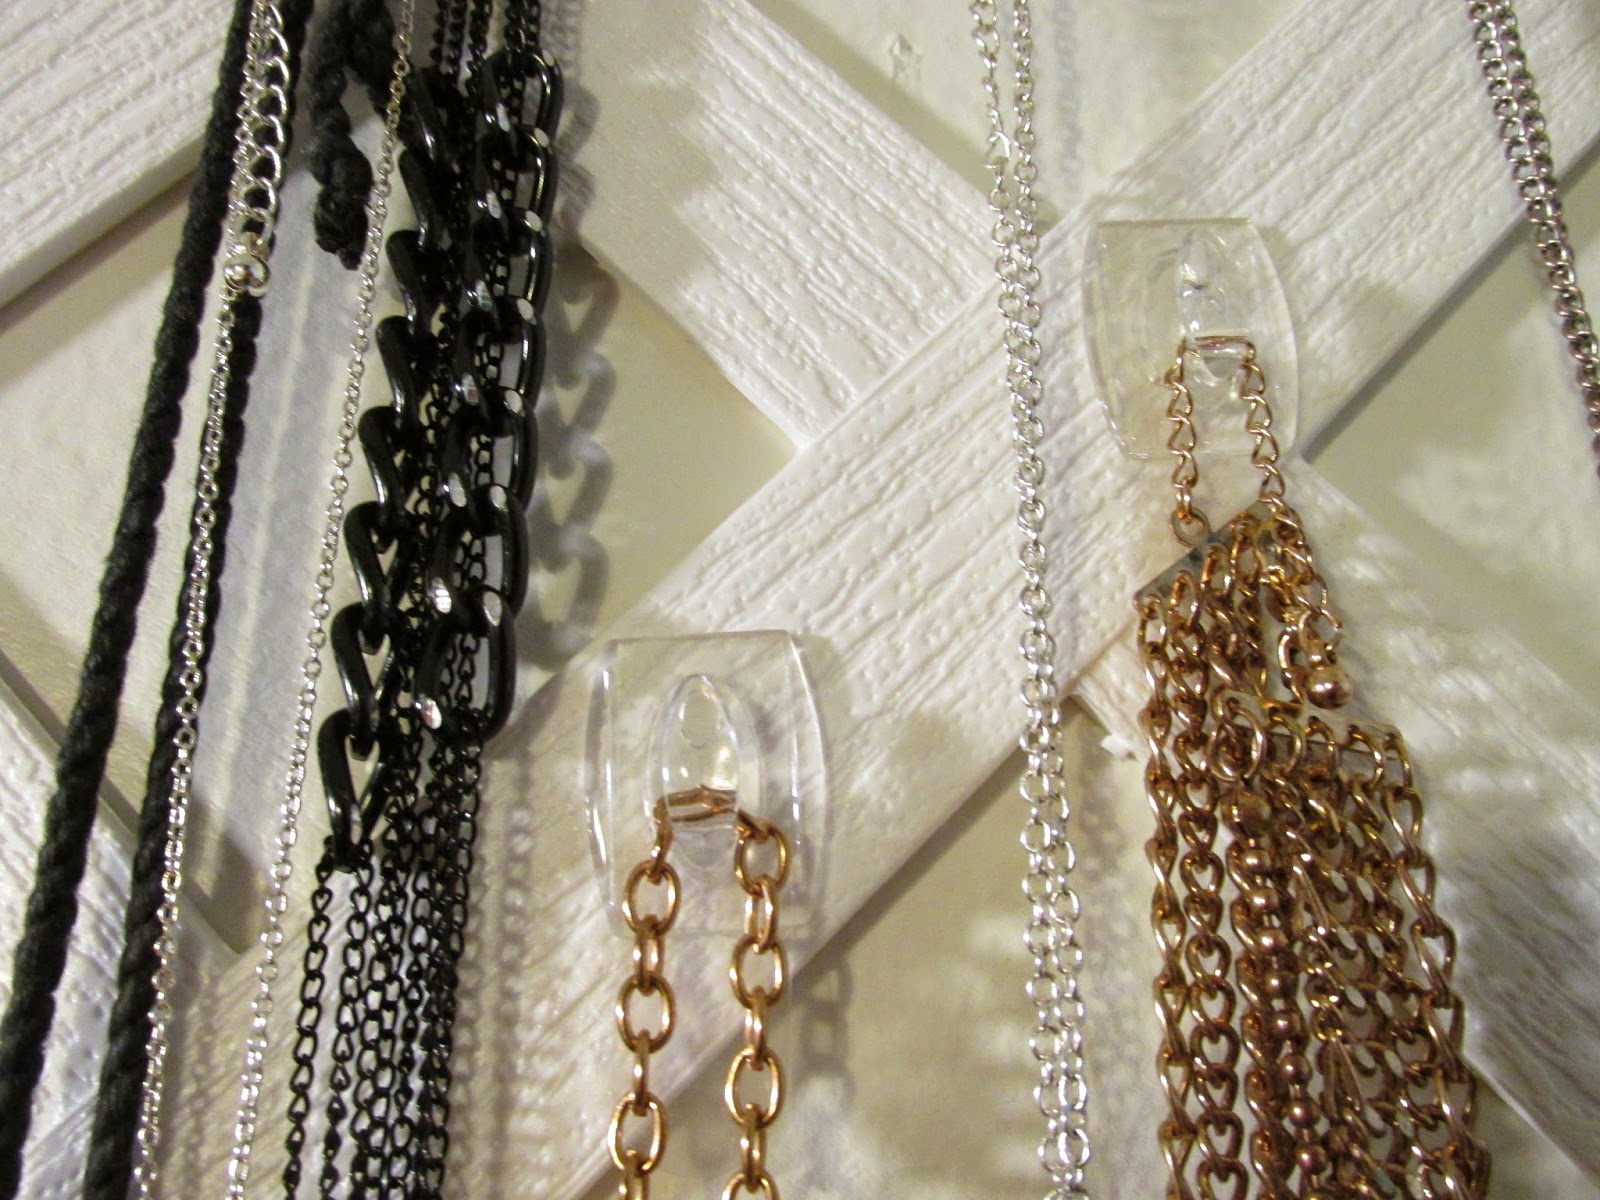
Natalie randomly attached lots of Command mini clear hooks to the trellis for me.  I used to have more hooks attached, but a couple popped off during a move. I haven't gotten around to putting more on. 
Yes, I do have tons more necklaces that aren't hung up. Then there's the antique jewelry box with my stash of pearls and all the other pretty things


close up of command hooks 


 So, That's my necklace holder! I hope you like it! I don't know about you, but I'm excited about getting more Command hooks this week and hanging up the rest of my collection. Yay! Then I can weed out the 3 orange necklaces and get something to match all the black I wear on a daily basis. :)

Hugs!
Caroline

love and cute strangers

"A perfectly cute stranger fell in love with me last Saturday. Let me explain. It all started a couple weeks before Valentines...